Deploy Middleman static website to AWS S3 bucket, set up IAM user and sync with AWS cli
First of all, most important: Never save any secret, password or API key in the parts of your middleman project that can be built and deployed to production as everything synched to AWS S3 will be public!
With the warning out, let's go and create a new S3 bucket first.
Create AWS S3 bucket to store and host your website
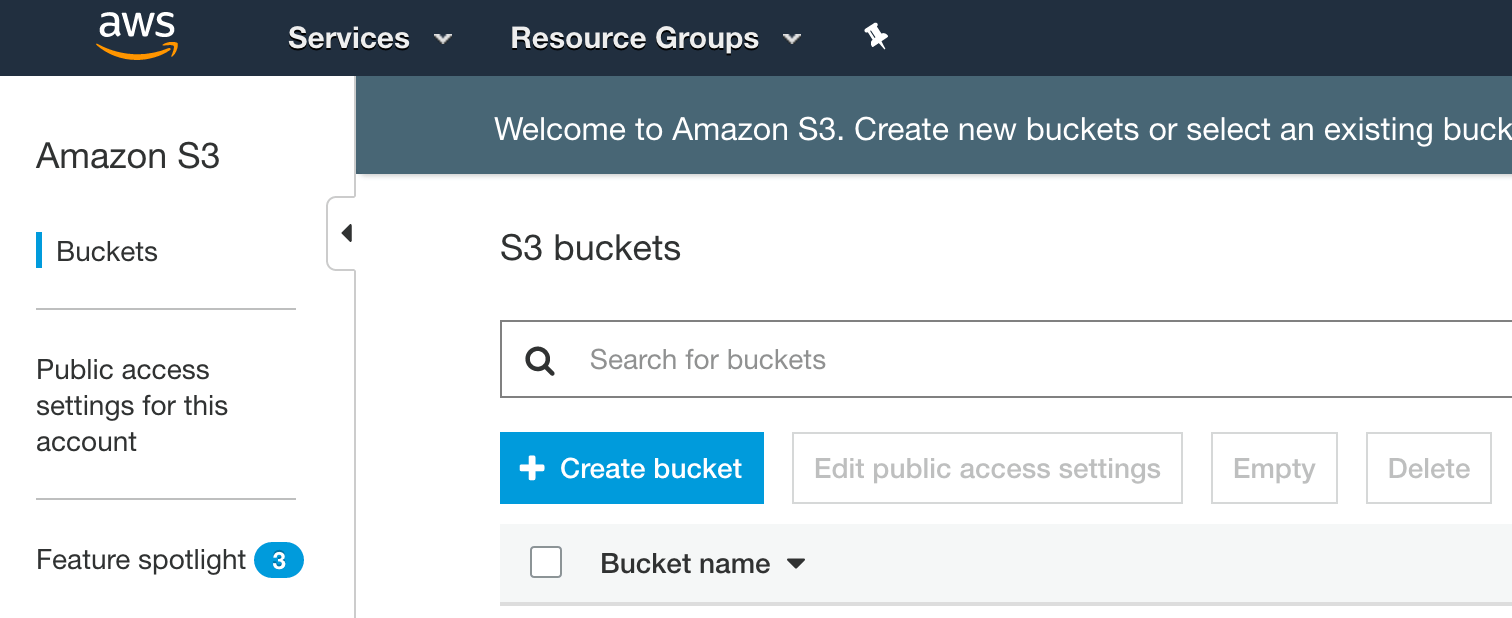
Head over to your AWS management console, head over to "S3" and create a new bucket by clicking on "+ Create bucket":
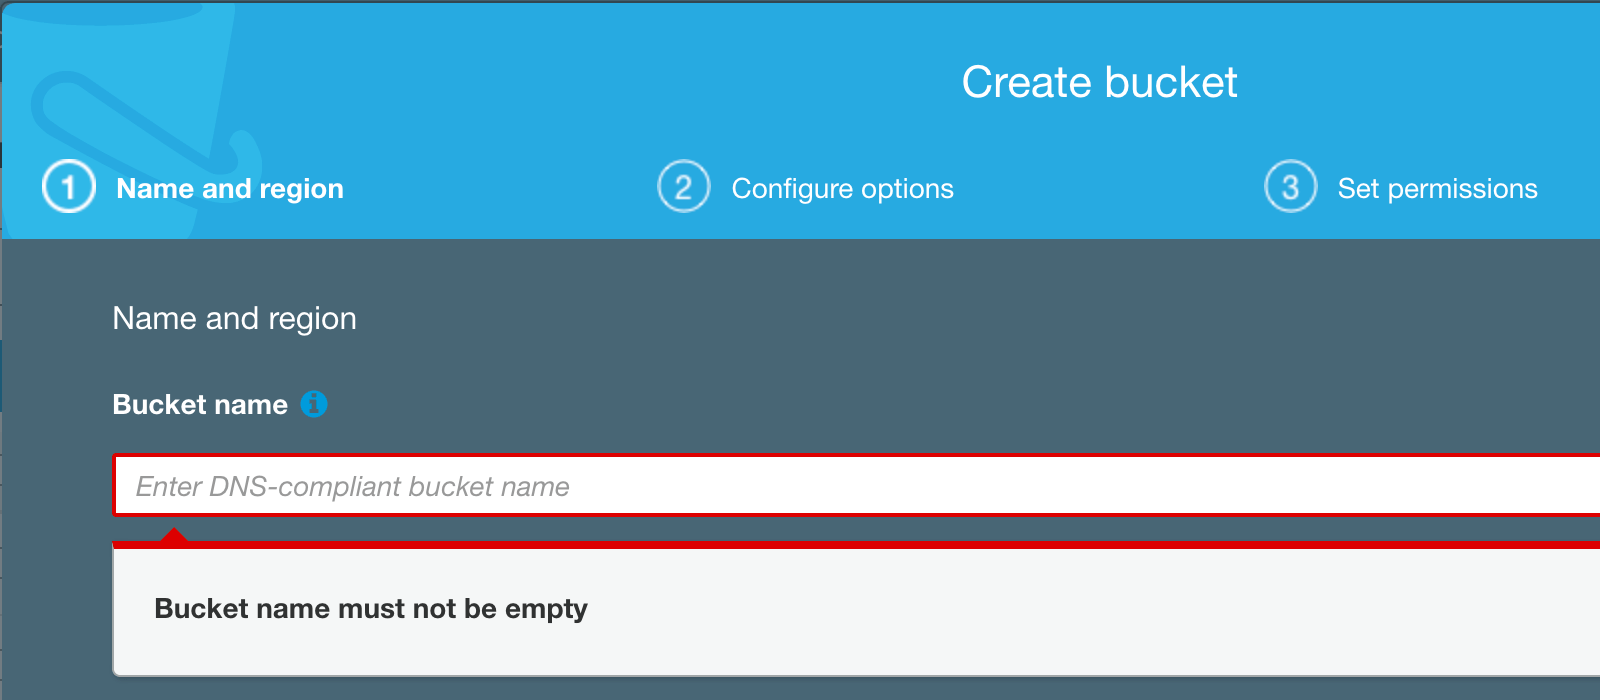
The name of the bucket is very important, it is unique for all S3 buckets globally and needs to exactly match your domain name:
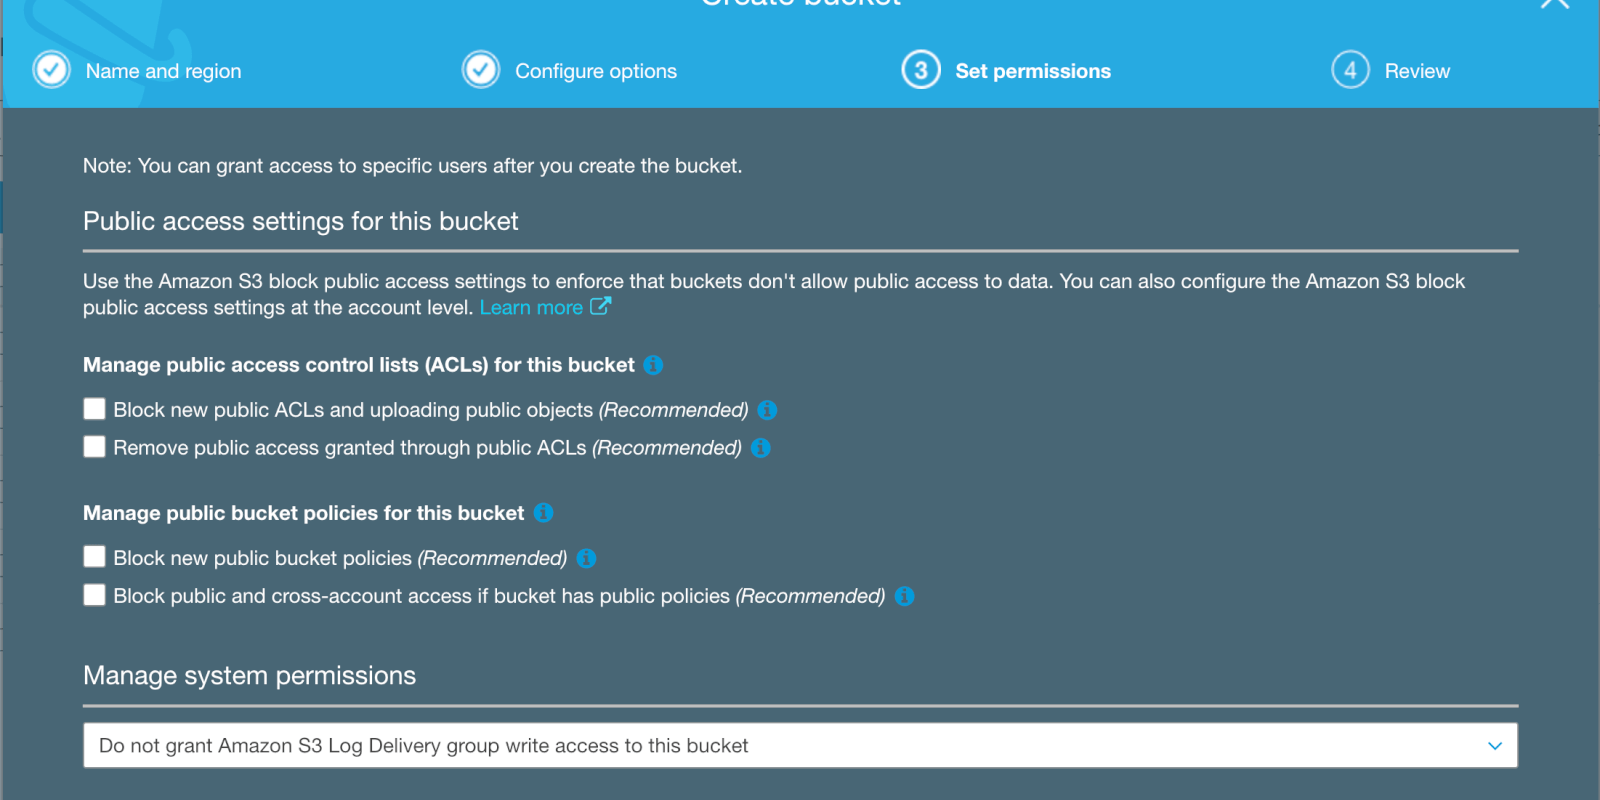
You can leave "(2) Configure options" as is. In "(3) Set permissions" make sure to uncheck all four checkboxes to be able to make it a public website and also deploy your built middleman project to it:
Confirm your settings in (4) and create the bucket. Congrats, the first step is done!
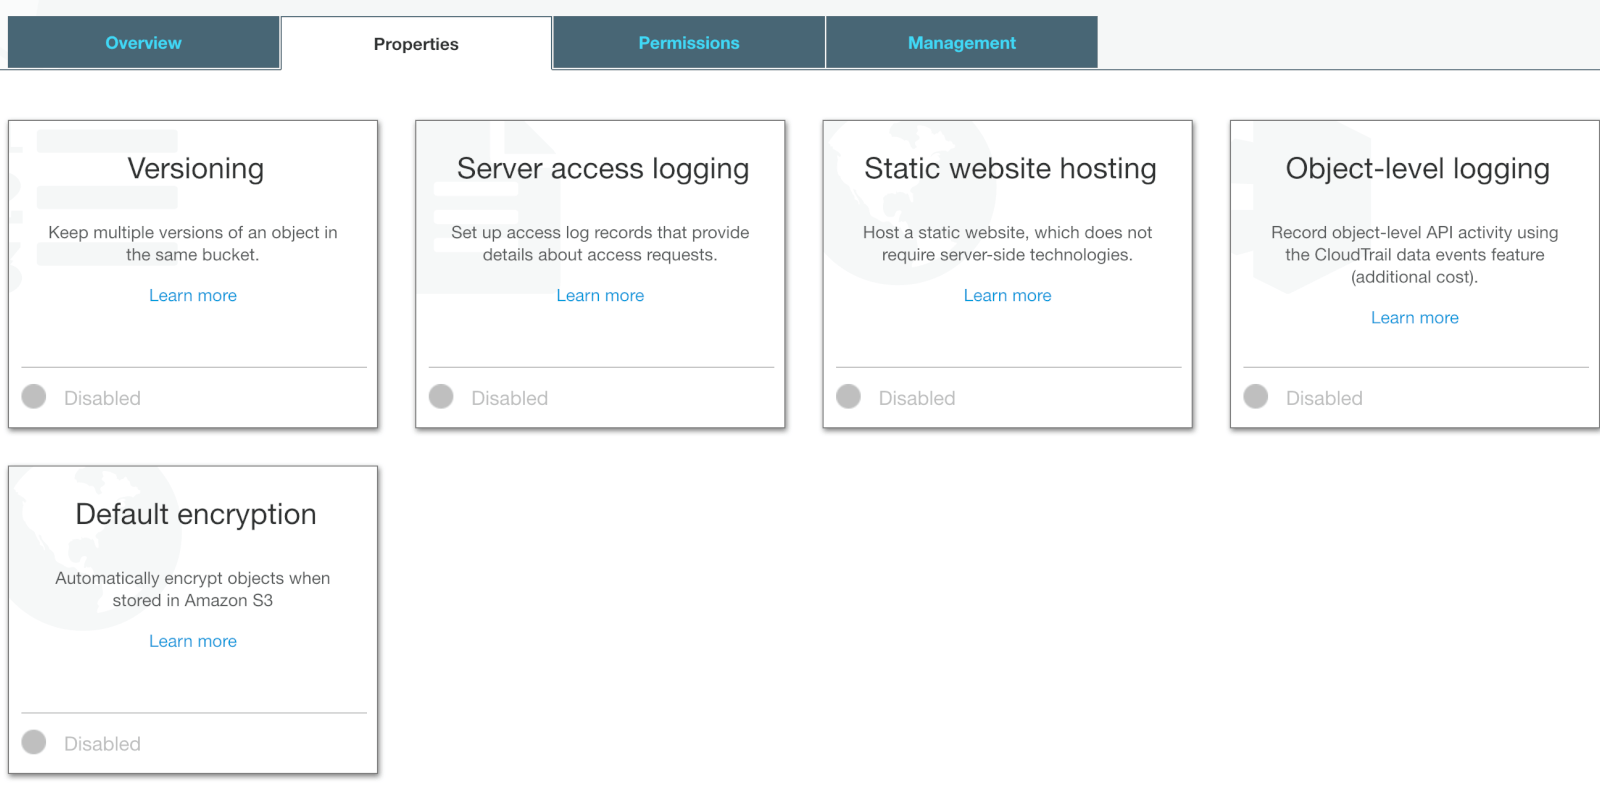
You now need to make your newly generated S3 bucket behave as a static website. For this, head over to the permissions tab and select "Static website hosting":
Select "Use this bucket to host a website", and put "index.html" as the main index (the name for the file which will be displayed on your root domain), and "error.html" for the error page (e.g., 404 page not found error):
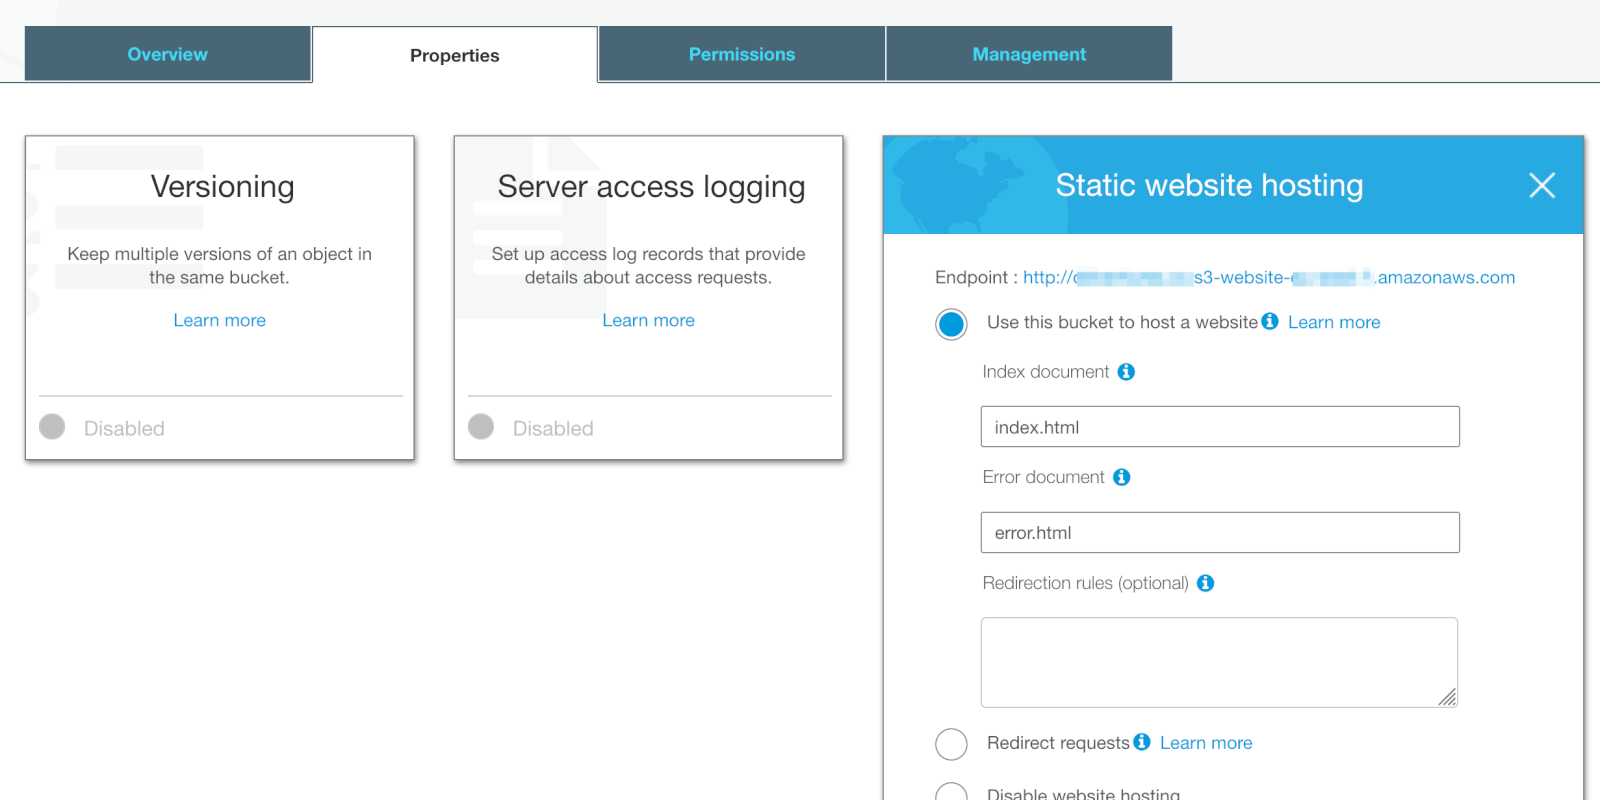
I would suggest to now already copy the "Endpoint URL", consisting of your domain name used for the name of the S3 bucket, the AWS region you're in, and "s3-website". You will need it later but can also always look it up here.
Bonus: If you want to test things, you can create a super simple index.html document with <h1>Hello world</h1> and upload it manually to the S3 bucket via the AWS S3 interface. Heading then to the domain endpoint from above should display "Hello world"!
Congrats, you're done with the first step - you have a live S3 bucket which can host your website. We're now only missing a few things, you will need to have the page accessible from your real domain (not the long AWS S3 endpoint link), you would want to be able to sync your middleman project to the S3 bucket, and to do this you need to have an AWS IAM user with the correct permissions. Let's tackle these steps in reverse.
Add IAM user with access rights to deploy your static page
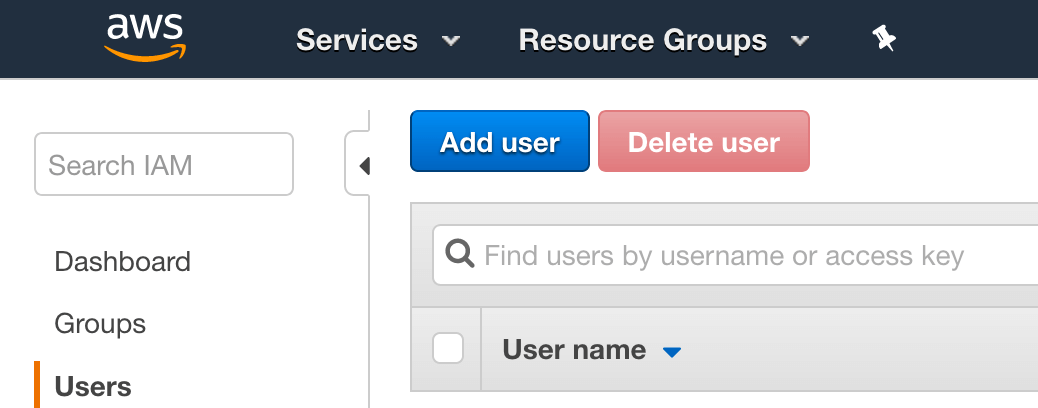
In order to deploy from your local machine, we will create an IAM user with permissions to only write and edit data on the S3 bucket just created for your static website. Head over to "Add user" in the IAM dashboard of AWS console:
Pick a name, and make sure to enable "Programmatic access" in order to sync from command line:
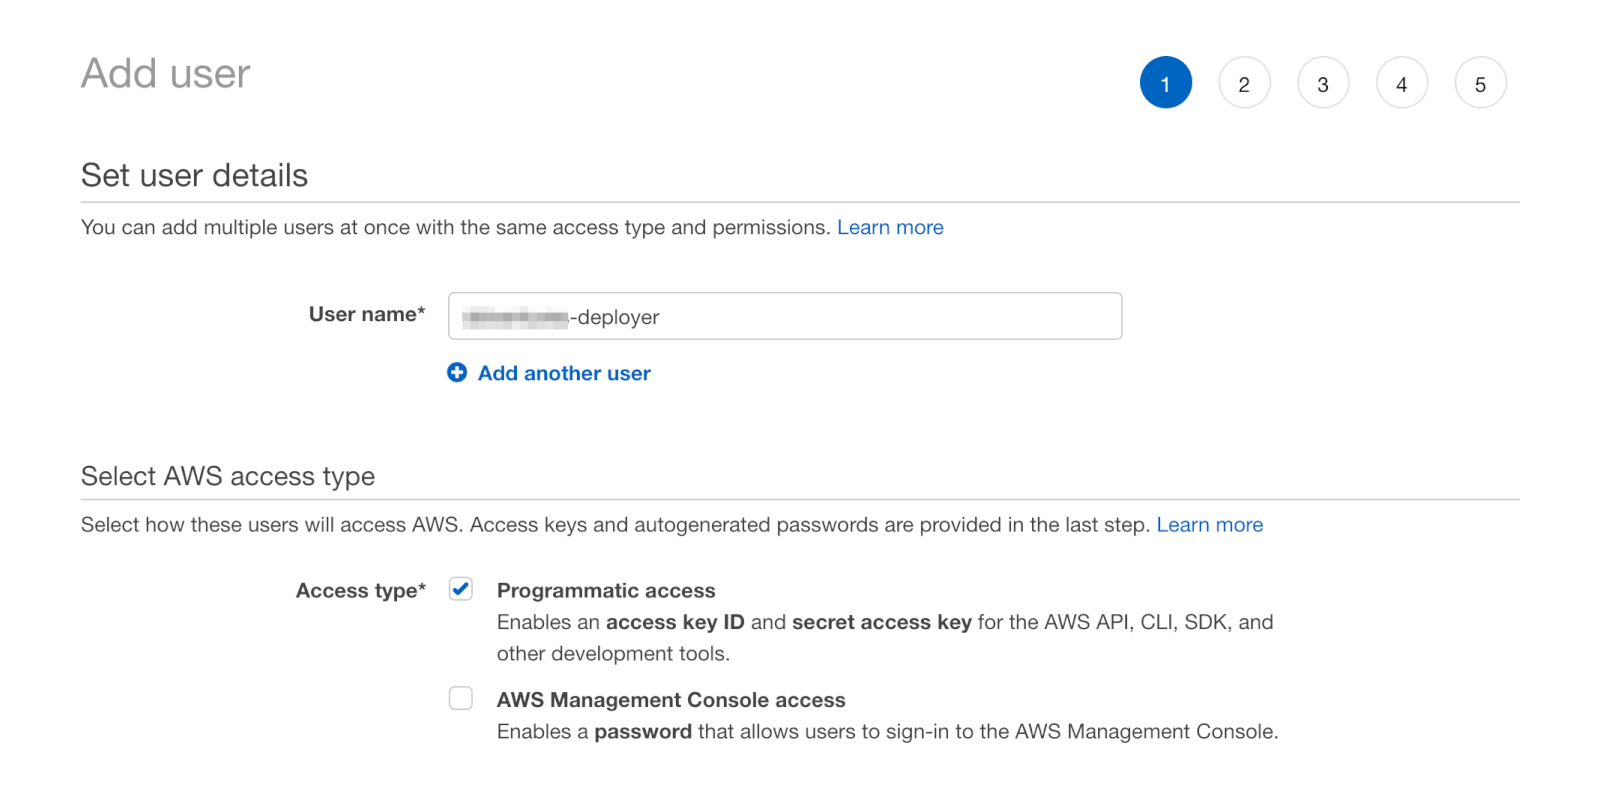
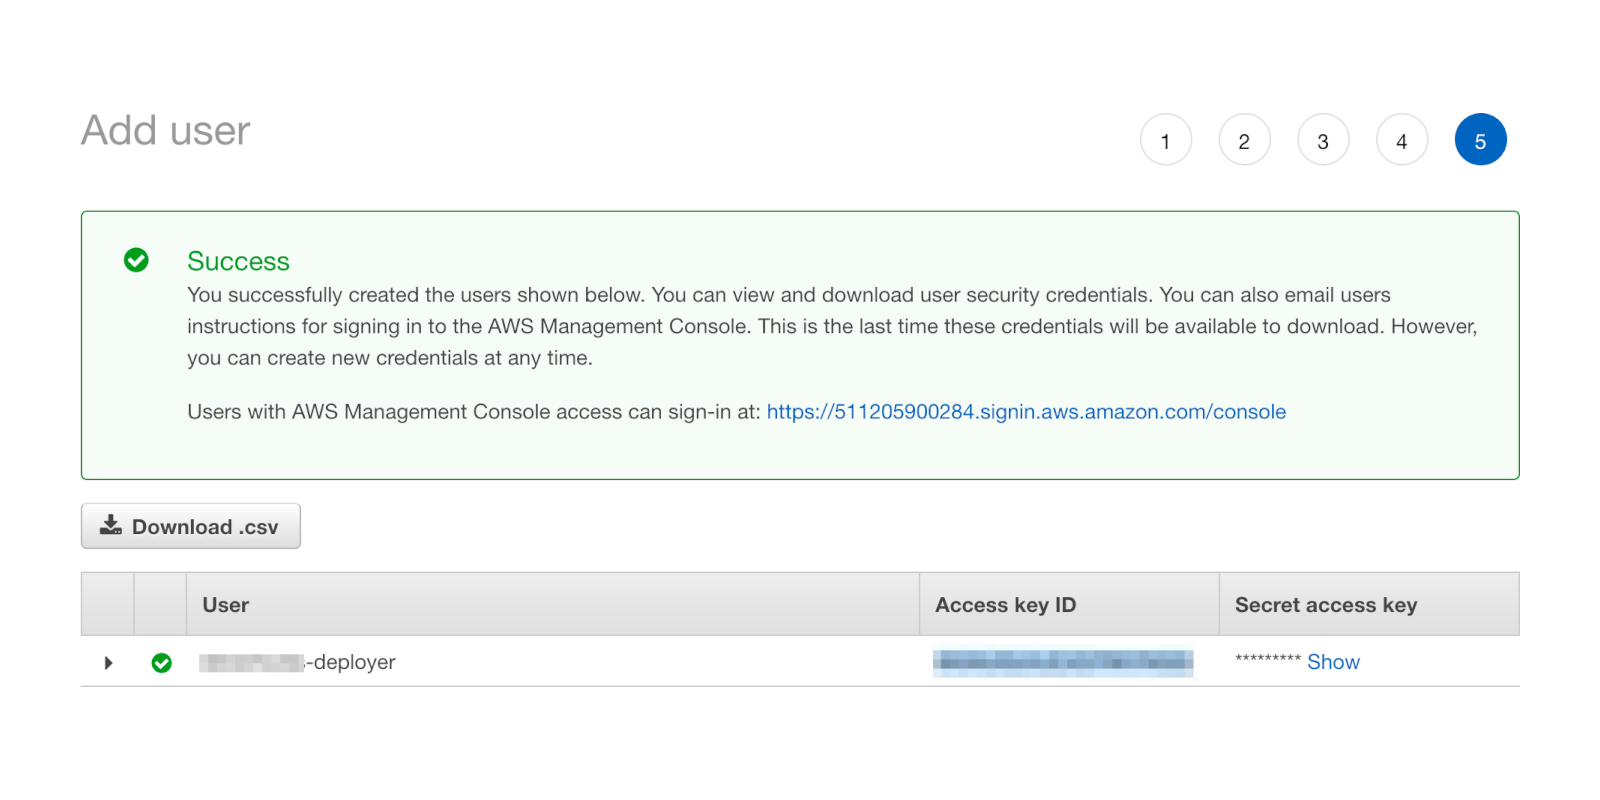
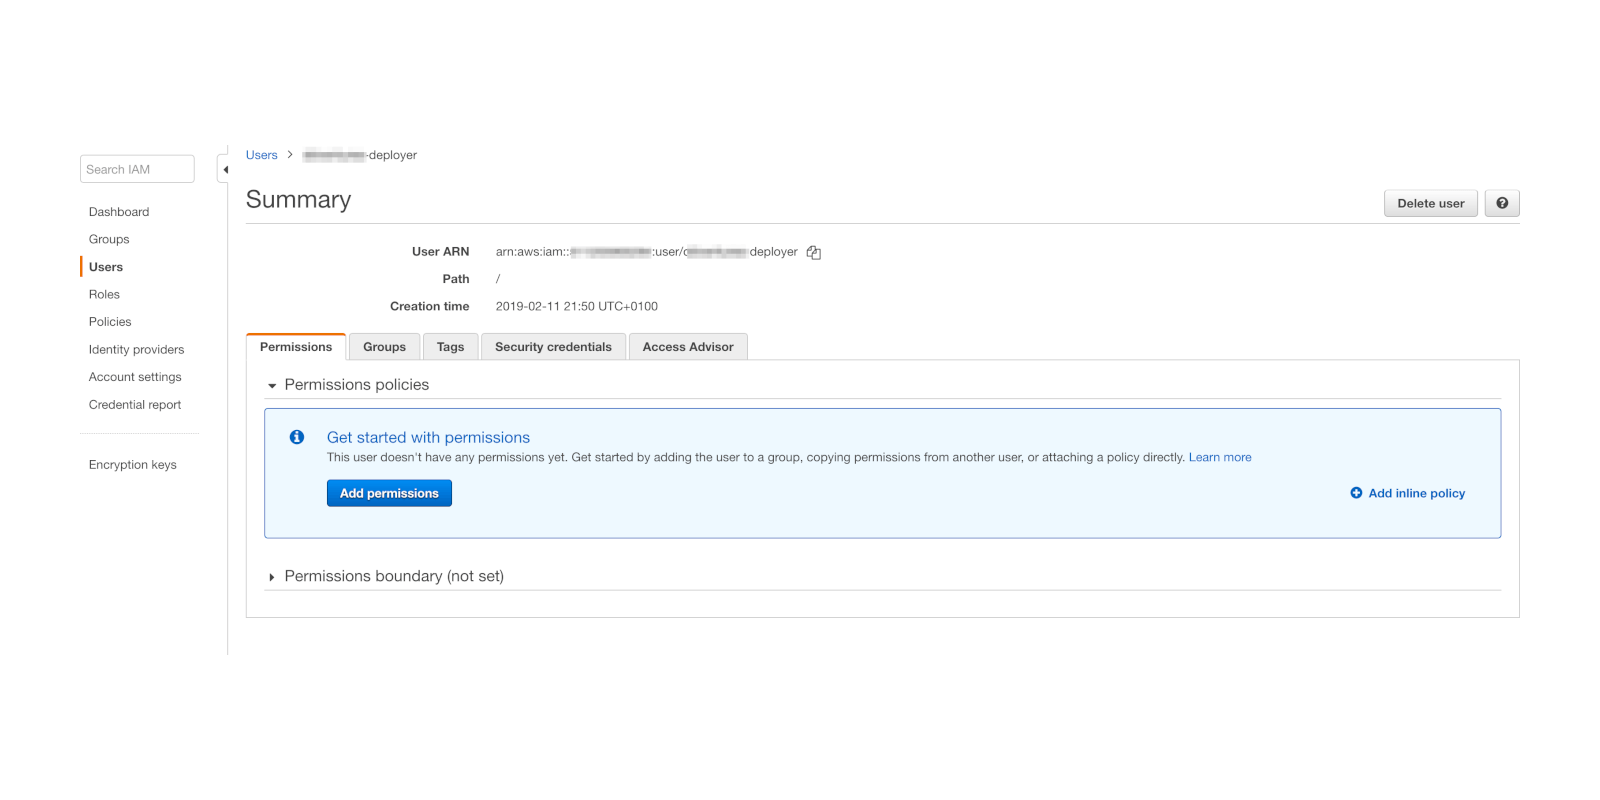
Keep all other fields as default when going to the last step and you have now created a blank user with no access rights so far. Make sure to note the "Access key ID" and "Secret access key", but outside of your middleman folder:
Now, you will need to add the correct permissions to access the S3 bucket. Go to permissions for your new user, and click "Add Inline Policy":
There, go to the "JSON" tab, and add the following policy:
{
    "Version": "2012-10-17",
    "Statement": [
        {
            "Sid": "00001",
            "Effect": "Allow",
            "Action": [
                "s3:*"
            ],
            "Resource": [
                "arn:aws:s3:::NEW_STATIC_WEBSITE.COM",
                "arn:aws:s3:::NEW_STATIC_WEBSITE.COM/*"
            ]
        }
    ]
}
In AWS AIM it should look like this:
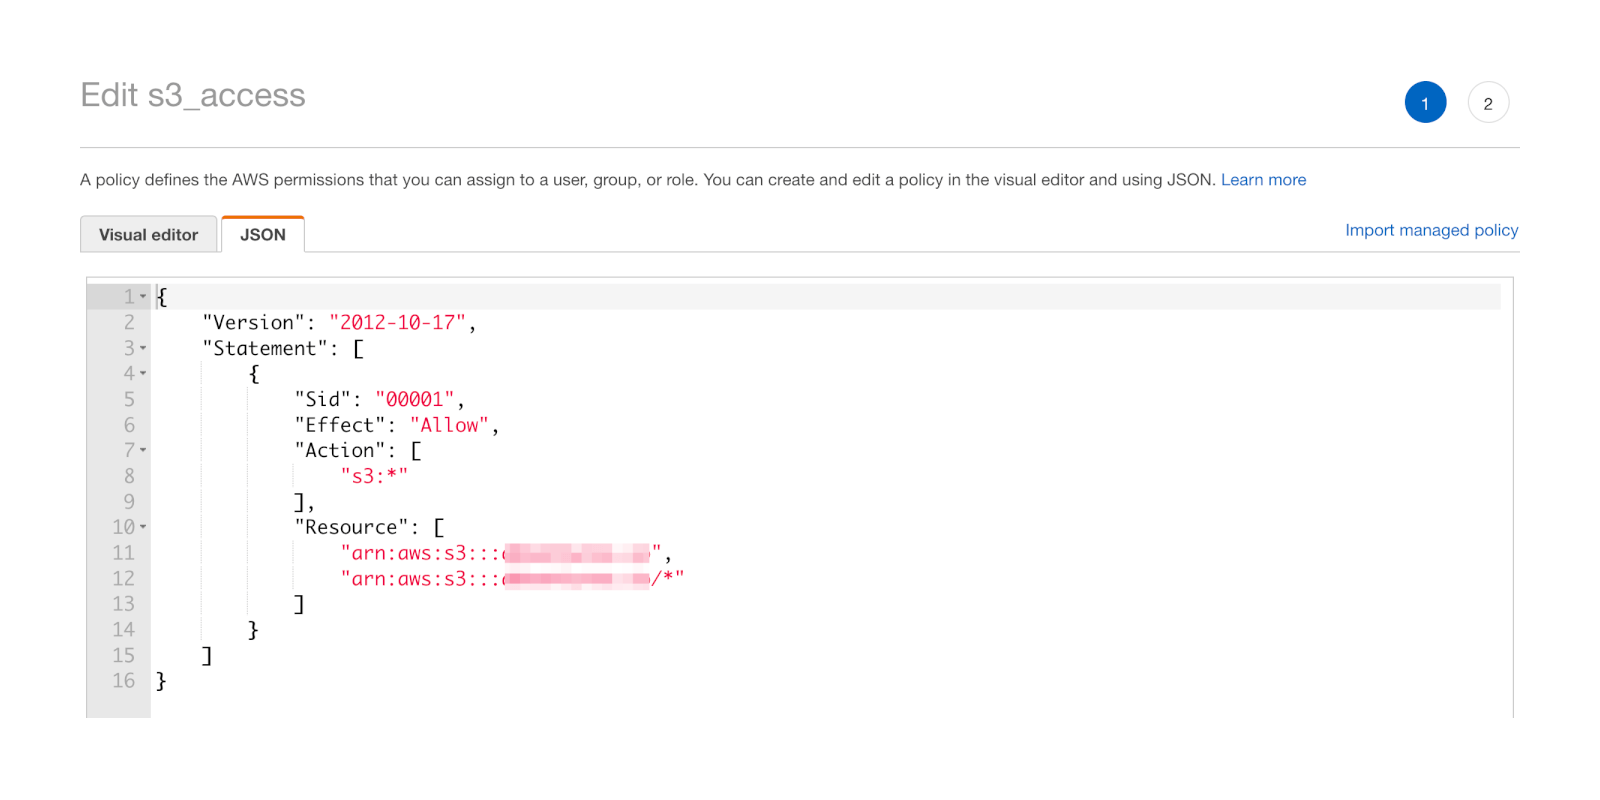
Few notes for the policy: Don't change the version date, AWS really doesn't like that. Feel free to pick any Sid that fits you. And obviously replace the "NEW_STATIC_WEBSITE.COM" with your website domain, which equals your S3 bucket name (see above). "s3:*" just means that your user will be able to perform all S3 actions available on the S3 bucket specified.
Again, congrats, you now have a dedicated AIM user with its own "Access key ID" and "Secret access key" that can modify your static website S3 bucket (and nothing else). Let's use this user to deploy your page!
Sync your website to S3 to deploy your static page from the command line with AWS cli
There are myriad ways to deploy middleman projects to S3, and I tried many of them. For some reason however I struggled with most, until I came across the easiest way that actually worked by using the AWS command line interface, thanks to this blog post about a new way to deploy to Amazon S3 by Jordan Elver. Most of the steps here are learned from him.
First and foremost, make sure you have the AWS cli (command line interface) installed.
Next, you need to let aws cli "know" about the user you created to deploy. Go and edit ~/.aws/config as follows:
vim ~/.aws/config
There, add the following part:
[profile IAM_user_name]
aws_access_key_id = XXXXXXXXXXXXXXXX
secret_access_key = XXXXXXXXXXXXXXXX
region = us-xxxx-1
Save and exit vim (with a bit of googling maybe ;) and you're almost done.
The following two next steps will be necessary every time you deploy, everything else is just a one-time effort to set up.
First, build your middleman project - basically "compile" all your erb sheets with variables and partials and helpers into just html, css, and javascript:
$ bundle exec middleman build
If all went successful, you should have your complete website ready in the "build" folder. Next, sync the "build" folder with the aws cli directly to your S3 bucket. Given that your IAM user has the right permissions it should be a breeze:
$ aws s3 sync build s3://NEW_STATIC_WEBSITE.COM \
    --profile IAM_user_name \
    --delete \
    --acl public-read
Congrats, you have now successfully synced your locally built middleman project to your S3 bucket! You can even check it out by going to the S3's "Endpoint URL" from above, and you should see your website live. As mentioned, repeat the bundle exec middleman build and aws sync whenever you want to push changes to your website.
One thing to notice though, you don't have an asset pipeline similar to Rails (yet), so if you make css updates, they may take a bit of time to propagate especially once you're using a CDN like cloudflare. Great segue into the next section!
Connect your domain to your S3 bucket by changing the DNS record in Cloudflare
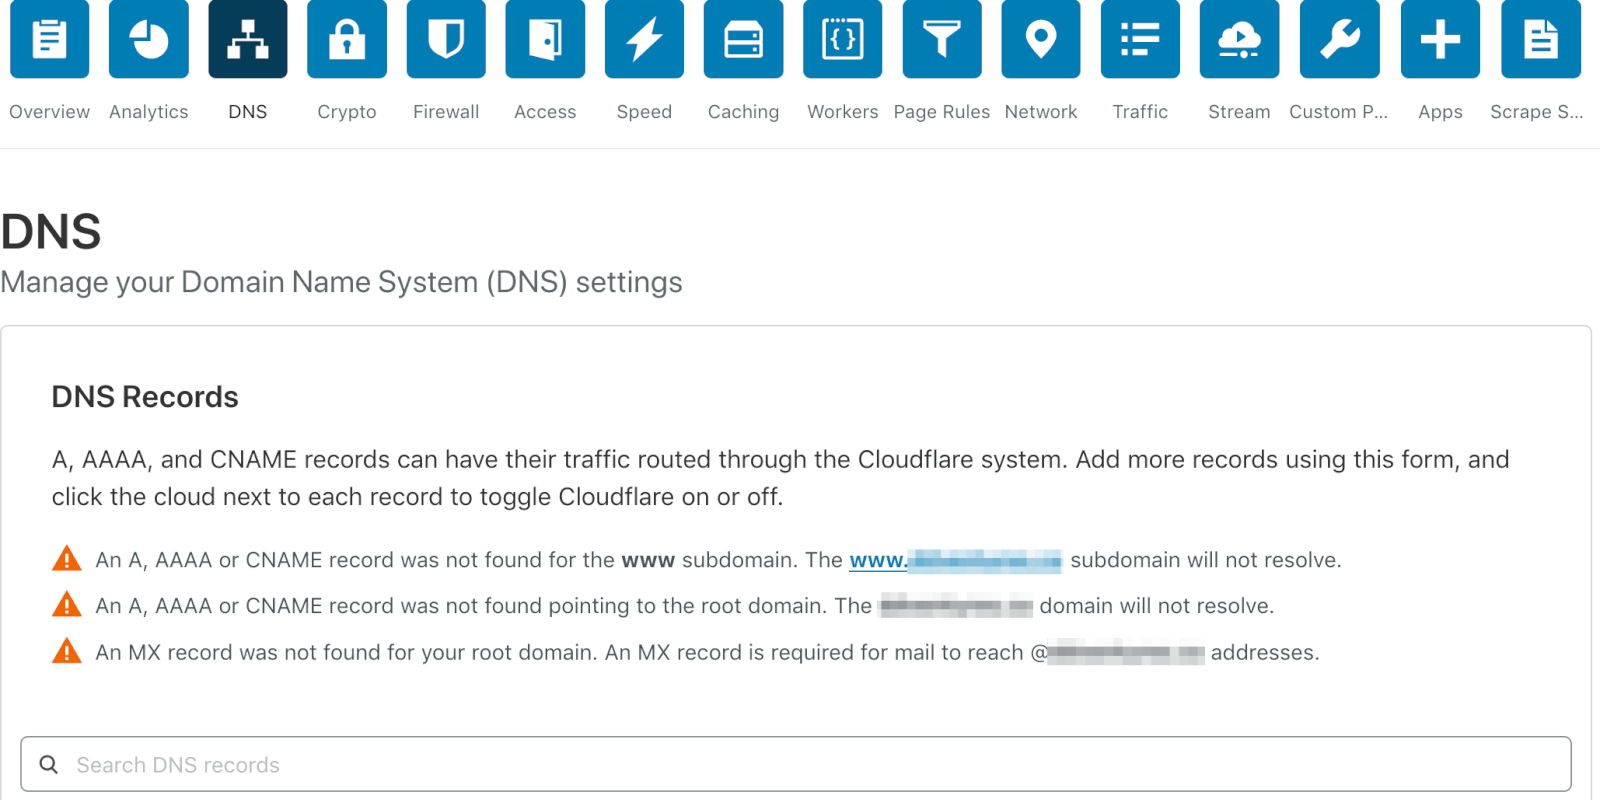
Now, as a last step, you need to connect your actual domain with the S3 endpoint url. This will be done by editing your DNS records, so head over to cloudflare. For brand new domains I tend to clear out all DNS records once to start fresh (make sure you know what you're doing!):
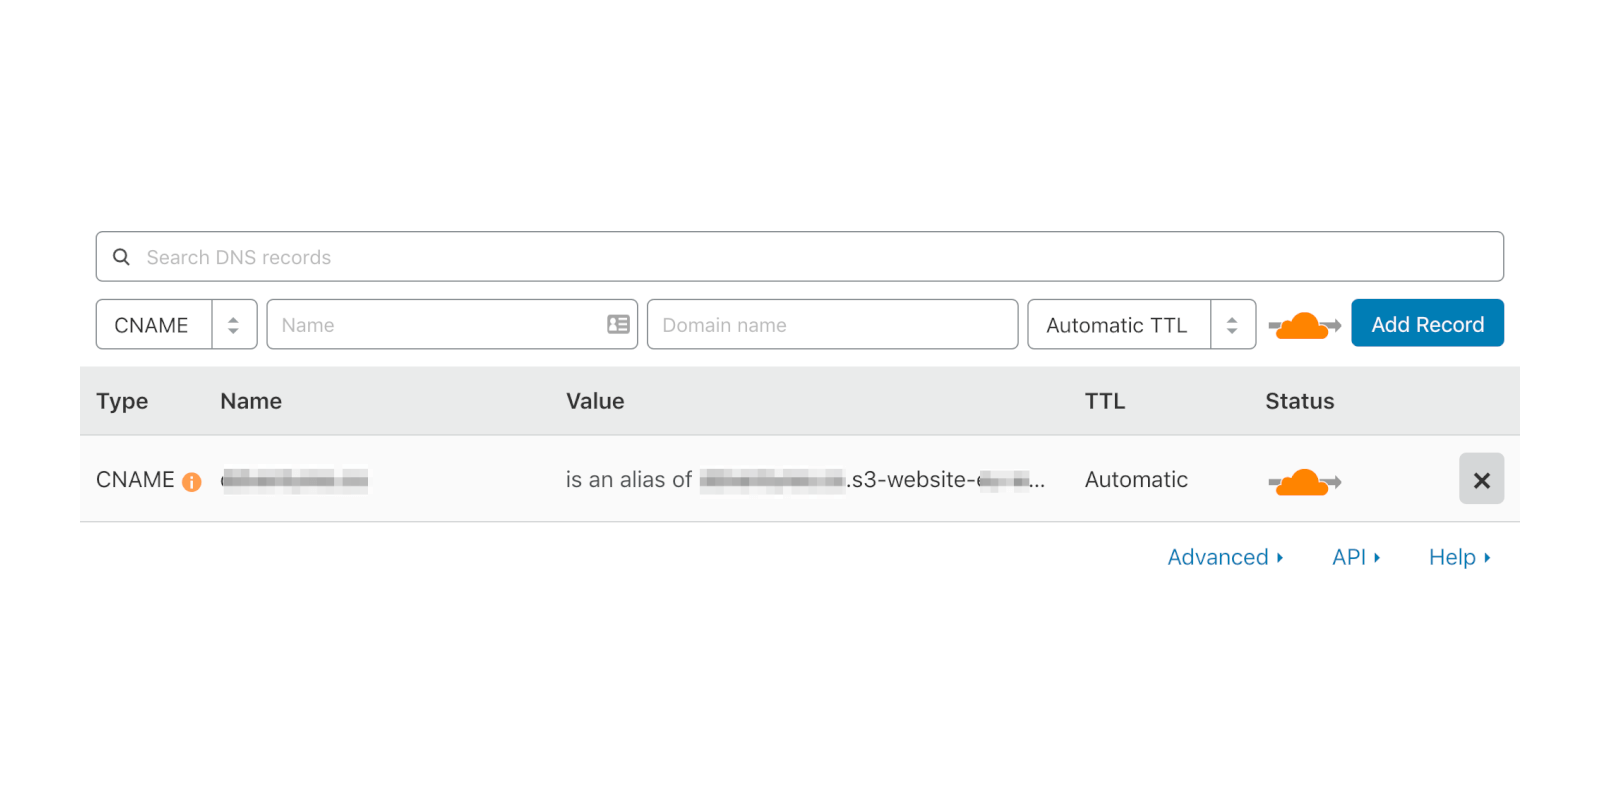
Now, add a new "CNAME" record. The name should be "@", and as the "domain name" just enter the S3 endpoint url from above without "http://":
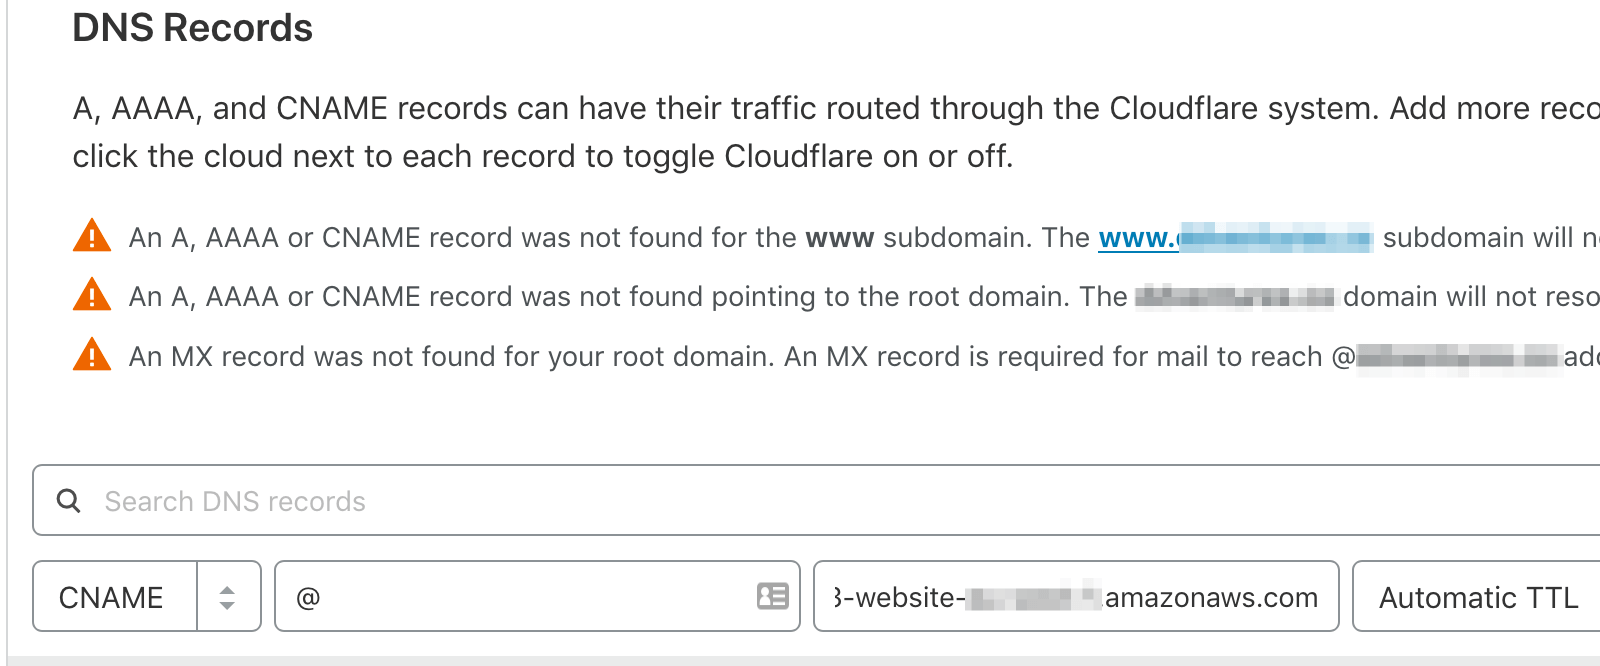
Once you hit "add record" it should look like this:
And... you're done! Head over to your new domain, and you will find your middleman built right there for you, hosted cheaply on your own S3 bucket. Congrats!